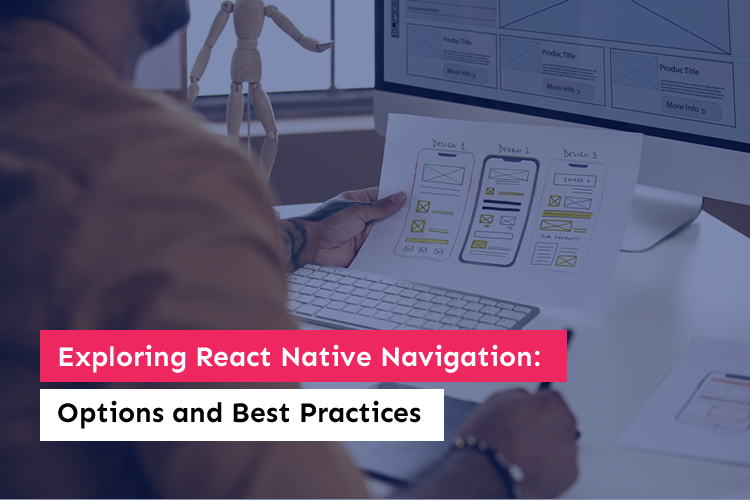
Exploring React Native Navigation: Options and Best Practices
Ever felt like your mobile app was a captivating tale, but users struggled to turn its pages? The world of mobile app development is full of breathtaking designs and innovative features, but the art of navigation often stands as the unsung hero of user engagement.
You are not alone in wondering how to guide users through the twists and turns of your app while maintaining its appeal and elegance. Welcome to a blog that promises to guide you through the maze of React Native Navigation, where options abound and best practices serve as guiding stars.
Imagine unlocking the secrets to creating navigation experiences that users not only appreciate but crave. Picture crafting journeys that seamlessly carry users from one screen to another, all while delivering an app that feels as smooth as a well-choreographed dance. What if we told you that this journey isn’t just about code, but about transforming your app into an immersive adventure that users can’t resist? This blog is your treasure map to achieving just that – revealing native navigation options that harness performance and customization like never before.
From the soaring heights of React Navigation’s versatility to the deep currents of React Native Navigation’s native performance, we’ll navigate through the very heart of these options. But it doesn’t stop there. We’ll unveil the compass of best practices, guiding you toward a horizon where seamless navigation, optimized performance, and user satisfaction converge. Let’s get started with some basics!
What is React Native Navigation?
At its core, React Native Navigation is the cornerstone of how users interact with your mobile app. It dictates how users transition between screens, access features, and explore content. React Native offers two primary navigation libraries that serve as your compass in this journey: React Navigation and React-Native-Navigation.
A Brief of Transitions and Interactions
At its essence, React Native Navigation state isn’t merely about moving from one screen to another; it’s about creating an immersive symphony of transitions and interactions that engage users on a visceral level. This intricate dance involves choreographing animations, synchronizing gestures, and orchestrating changes to craft a cohesive narrative that guides users through your app’s functionalities.
The Backbone of User Interaction
In the React Native ecosystem, navigation is not an add-on, it is an integral part of the app’s design. It regulates how users interact with the main elements of the application, navigate content, and access features. Like the conductor of an orchestra, React Native Navigation ensures that each interaction is harmonious and intuitive, guaranteeing that users can seamlessly navigate the digital landscape you’ve crafted.
React Navigation: A Versatile Toolkit
Within the realm of React Native Navigation, two prominent libraries emerge as beacons: React Navigation and React Native Navigation. React navigation native stack offers a versatile toolkit that presents a plethora of navigation patterns. From stack navigation for linear flows to tab navigation for apps with multiple sections, React Navigation provides building blocks that can be customized to cater to various app structures. It’s akin to a toolbox, empowering you to construct navigation flows that align precisely with your app’s purpose.
React Native Navigation: Harnessing Native Power
On the other side of the navigation spectrum, React Native Navigation takes a different route. This library uses the built-in navigation features of iOS and Android to work really fast. It means the movements and transitions in the app are super smooth, and it manages memory well. This makes the app nicer to use.
Navigational Decisions: Shaping User Experiences
In essence, React Native Navigation serves as the heartbeat of your app, dictating the rhythm of user interactions. The decision between React Navigation and React Native Navigation is more than just a technical one; it affects how users navigate, examine, and interact with your app. As you begin your development journey, keep in mind that the navigation choices you make are vital for creating an app experience that resonates deeply with users and keeps them engaged.
Why Does Native Navigation Matter?

In mobile app making, how you move around in the app can make a big difference. Using the built-in navigation of the phone is key because it makes the app run smoother and faster. This means the animations are nicer, transitions happen quicker, and moving around the app feels really easy.
Seamless Integration with the Platform’s DNA
Native navigation state matters because it seamlessly integrates with the very essence of the operating systems on which your app resides – iOS and Android. Unlike web-based navigation solutions, native navigation leverages the underlying native components, adhering closely to the design principles and patterns familiar to users of each platform. This integration provides users with a sense of familiarity, allowing them to intuitively navigate your app without encountering any cognitive dissonance.
Enhanced Performance for a Smooth Journey
User experience is paramount in app development, and native navigation library offers a clear advantage in this regard. By harnessing the native navigation components, libraries like React Native Navigation tap into the performance optimizations provided by iOS and Android platforms. This results in smoother animations, faster transitions, and overall boosted responsiveness. Users appreciate an app that transitions smoothly from screen to screen, creating a sense of fluidity that keeps them interested.
Crafting Consistent and Polished User Interfaces
Making sure everything in the app works the same way is super important for making users happy. Using the built-in navigation library helps to maintain consistency because it sticks to the phone system’s rules. So your app looks and feels like it belongs on the user’s phone alongside all of the other apps. Users are more comfortable and trusting of apps that follow the same rules.
Optimal Memory Management
When it comes to memory management, React Native stack navigation shines. Native components are optimized to use system resources efficiently, resulting in reduced memory consumption and better overall performance. This is particularly vital for mobile devices with limited resources. By using native navigation, you’re guaranteeing that your app runs smoothly even on devices with lower specifications.
A Pathway to Creativity
Choosing native navigation library doesn’t mean sacrificing creativity. On the opposite, it can open the door to limitless possibilities. Direct access to native APIs provides developers with more control over animations, transitions, and gestures, allowing them to craft unique and captivating user experiences that push the boundaries of app design.
A Resounding User-Centric Approach
In the end, React Native navigator is a user-centric approach. This is all about making users feel good and happy when they use your app. When it’s easy to move around, things look nice, and users feel comfortable with the app, they’ll want to keep using it. This makes them stick around and feel happy with what they’re using.
Options and Best Practices for Native Navigation

Now that we’ve established the significance of native navigation, let us delve into the options available for implementing this vital aspect in your React Native app. Each option presents unique advantages and considerations, so let’s explore the key navigation stack libraries and their best practices to help you make an informed decision.
Option 1: React Navigation – Crafting Flexibility
React Navigation library remains a popular choice for its flexibility and adaptability to various app structures. With a range of navigation patterns at your disposal, React Navigation empowers you to design navigation flows that align with your app’s specific requirements:
- Stack Navigation: React Native android navigation bar is ideal for linear journeys, such as onboarding or authentication processes.
- React Native Tab Navigator: React native tab navigation is perfect for apps with multiple sections, offering a familiar React native bottom tab navigator.
- Drawer Navigation: Suited for apps with an extensive array of screens, providing a side drawer menu for navigation.
- Customization: React Navigation facilitates the creation of tailored transitions, gestures, and animations for a unique user experience.
Best Practices
- Hierarchy Simplicity: Avoid excessive nesting to maintain a clear navigation structure.
- Lazy Loading: Load screens only when necessary to enhance performance.
- State Management Integration: Combine with a state management solution like Redux for consistent state handling.
- Consistent UI/UX: Ensure a uniform design across screens for a seamless user journey.
Option 2: React Native Navigation – Harnessing Native Power
React Native Navigation, as the name suggests, capitalizes on the native navigation components provided by iOS and Android platforms. This approach focuses on optimal performance and seamless user interactions:
- Native Components: Direct usage of native components results in smoother animations and improved performance.
- Seamless Transitions: Complex animations and transitions are executed with finesse through direct access to native APIs.
- Hardware Acceleration: The library leverages hardware acceleration, enhancing app speed and responsiveness.
Best Practices
- Testing and Debugging: Rigorously test navigation flows across different devices and platforms.
- Offline Handling: Implement graceful navigation adjustments for offline scenarios or connectivity loss.
- Localization Consideration: Integrate localization into navigation components for smooth language transitions.
Option 3: NavigatorIOS – iOS-Centric Navigation Solution
NavigatorIOS is a navigation tool specifically designed for iOS apps. It offers a native-like navigation experience made for to iOS users’ expectations:
- iOS-Centric Navigation: NavigatorIOS provides navigation components and behaviors optimized for iOS, ensuring a seamless and intuitive navigation experience for iPhone and iPad users.
- Backward Compatibility: With built-in support for iOS navigation patterns and conventions, NavigatorIOS ensures compatibility with older iOS versions, maintaining a consistent user experience across devices.
- Integrated Features: NavigatorIOS seamlessly integrates with other iOS features and functionalities, such as sharing options, notifications, and system controls, enhancing overall app usability and user engagement.
Best Practices
- iOS Design Guidelines: Adhere to Apple’s Human Interface Guidelines to ensure that NavigatorIOS navigation components align with iOS design standards and provide a familiar user experience.
- Speed Optimization: Optimize navigation performance by minimizing unnecessary animations and utilizing iOS-specific optimization techniques, like preloading data and using lightweight navigation components.
- Accessibility Features: Utilize accessibility features and enhancements within NavigatorIOS navigation components to guarantee that the app is accessible to all users, including those with disabilities.
Option 4: React Router Native – Extending Web Navigation to Mobile Apps
React Router Native is like a special tool that makes it easy to move around in React Native apps. It uses ideas from the web, so if you’re used to making websites, you’ll feel right at home using it to navigate in mobile apps too.
- Web Navigation Paradigms: React Router Native lets developers use navigation ideas they’re already familiar with from making websites, like routes (paths you take through a website) and links (clickable buttons that take you to different parts of a website), to make it easy to move around in React Native apps. This makes it simpler for web developers to switch to making mobile apps.
- Route-Based Navigation: With React Router Native, moving around in the app is based on paths that developers set up. This helps them control how users navigate through the app and makes sure that everything works the same way on all the different screens.
- Integration with React Ecosystem: React Router Native plays well with other tools and libraries that React developers commonly use. This means you can combine different tools to build your React Native app exactly how you want it, without any fuss.
Best Practices
- Cross-Platform Compatibility: Design navigation flows with cross-platform compatibility in mind, so that navigation components behave consistently on iOS and Android devices.
- Code Reusability: Utilize code reusability by using React Router Native alongside other React libraries and components, maximizing development efficacy and maintaining a scalable codebase.
- Performance Optimization: Optimize navigation performance by minimizing unnecessary re-rendering and utilizing React Router Native’s built-in caching mechanisms for route information.
Option 5: React Native Navigation Experimental – Cutting-Edge Navigation Features
React Native Navigation Experimental offers experimental navigation features and capabilities for developers looking to push the boundaries of navigation in React Native apps:
- Cutting-Edge Features: React Native Navigation Experimental brings in new and advanced ways to move around in your app. It lets developers try out fresh ideas and test different ways of navigating through the app.
- Customization and Extensibility: The library provides extensive customization options and APIs for building custom navigation solutions tailored to specific app requirements, enabling developers to create unique and creative navigation experiences.
- Community-Driven Development: React Native Navigation Experimental is actively developed and maintained by the React Native community, with contributions from developers worldwide, guaranteeing continuous improvement and innovation.
Best Practices
- Community Engagement: Engage with the React Native community to stay updated on the latest developments and best practices for using React Native Navigation Experimental, leveraging community resources and feedback for optimal results.
- Experimentation and Testing: Experiment with different navigation features and design patterns offered by React Native Navigation Experimental, and conduct thorough testing to evaluate their performance and usability in real-world scenarios.
- Documentation and Support: Refer to comprehensive documentation and community forums for guidance on using React Native Navigation Experimental effectively, and seek support from fellow developers and contributors when encountering challenges or issues.
Option 6: React Native Gesture Handler – Advanced Gesture-Based Navigation
React Native Gesture Handler is a strong tool for dealing with touch movements and actions in React Native apps. It lets you create fancy navigation that responds to how users touch the screen.
- Gesture Recognition: React Native Gesture Handler helps developers recognize different types of touch movements really well. This means developers can create special ways for users to move around in the app that fit exactly what they need.
- Fluid Navigation Animations: This library makes the movements in the app look really smooth and natural because it uses the device’s own touch features. This makes the app feel quick and easy to use for the people using it.
- Cross-Platform Compatibility: React Native Gesture Handler works with both iOS and Android platforms, guaranteeing consistent gesture-based navigation experiences across devices.
Best Practices
- Gesture Responsiveness: Fine-tune gesture recognition parameters and sensitivity settings to ensure responsive and accurate gesture-based navigation interactions, enhancing user satisfaction and usability.
- Performance Optimization: Optimize performance by minimizing unnecessary gesture handling overhead and leveraging React Native Gesture Handler’s native implementation for smooth and efficient navigation animations.
- User Feedback and Iteration: Gather user feedback on gesture-based navigation interactions and iterate on the implementation to address any usability issues or areas for improvement, ensuring a seamless and enjoyable navigation experience for app users.
Navigating the Decision: Balancing Performance and Flexibility
When choosing between these options, consider the nature of your app and the user experience you aim to deliver. React Native web navigation offers the flexibility to cater to various navigation patterns, making it suitable for apps with diverse structures. React Native Navigation, on the other hand, excels in performance and following native design principles closely.
Platform-Specific Features
Think about whether your app needs special features that are specific to the type of phone it’s on. React Native Navigation uses the phone’s own parts to make it fit in perfectly with how the phone works. This is great for apps that need to use special phone features like swiping to move around or showing special buttons.
Development Time and Resources
Consider how much time and stuff you have to make your app. Using React Native web navigation might let you make your app quicker and fix problems more easily. Therefore, it might be a wise choice if you’re pressed for time or don’t have much money. However, if you want your app to function flawlessly over time, you should consider using React Native Navigation, which may require more setup time but ultimately result in modified app performance.
Scalability and Future Growth
Think about if your app might get bigger or more popular over time. React Navigation makes it easy to change and add stuff to your app as it grows, so it’s good for apps that might change a lot. React Native Navigation, on the other hand, can help guarantee your app continues to function properly even as more users start using it.
User Feedback and Testing
Pay attention to what people who might use your app say, and try out your app with them to see if they like it. This can help you figure out which way of moving around in your app works best for them and fits how they use apps.
Budget Considerations
Think about how much money you have to make and keep up your app. React Native web navigation might save you money at the start, but investing in React Native Navigation could help keep people using your app and make you more money in the long run.
Ultimately, the decision hinges on the balance between flexibility and performance that your app demands. In some cases, the app’s complexity may necessitate the native performance advantages offered by React Native Navigation. Alternatively, if your app requires a more intricate, custom navigation flow, React Navigation might be the optimal choice.
How to implement these Options and Best Practices for Native Navigation?
1. React Navigation Implementation Guide
Because of its adaptability to different app structures, React Navigation is a popular choice for implementing navigation in React Native apps. Here’s how to incorporate React Navigation into your project incrementally:
1. Setting Up Navigation
- Installation: Begin by installing the required packages using npm or yarn:
npm install @react-navigation/native @react-navigation/stack
or
yarn add @react-navigation/native @react-navigation/stack
- Initialization: Import necessary modules and initialize React Navigation in your app’s entry point, typically App.js:
import 'react-native-gesture-handler';
import { NavigationContainer } from '@react-navigation/native';

const App = () => {
  return (
    <NavigationContainer>
      {/* Your app's screens and navigation components */}
    </NavigationContainer>
  );
};

export default App;
2. Configuring Navigation Options
- Stack Navigator: Define navigation stacks for different sections of your app, specifying screen components for each route:
import { createStackNavigator } from '@react-navigation/stack';
import HomeScreen from './screens/HomeScreen';
import DetailsScreen from './screens/DetailsScreen';

const Stack = createStackNavigator();

const MainStackNavigator = () => {
  return (
    <Stack.Navigator>
      <Stack.Screen name="Home" component={HomeScreen} />
      <Stack.Screen name="Details" component={DetailsScreen} />
    </Stack.Navigator>
  );
};
export default MainStackNavigator;
- Customization: Customize navigation options such as header styles, screen transitions, and gestures using options provided by React Navigation:
	<Stack.Navigator
	  screenOptions={{
	    headerStyle: { backgroundColor: '#f4511e' },
	    headerTintColor: '#fff',
	    headerTitleStyle: { fontWeight: 'bold' },
	  }}
	>
	  {/* Screen components */}
	</Stack.Navigator>
3. Handling Navigation State
- Navigation Hooks: Utilize navigation hooks such as useNavigation and useRoute to access navigation state and parameters within screen components:
import { useNavigation, useRoute } from '@react-navigation/native';

const HomeScreen = () => {
  const navigation = useNavigation();
  const route = useRoute();

  return (
    // Screen content
  );
};
- State Management Integration: For app-wide navigation state management, combine Redux or other state management systems with React Navigation:
import { createStore, combineReducers } from 'redux';
import { Provider } from 'react-redux';
import { navigationReducer } from './reducers/navigationReducer';

const rootReducer = combineReducers({
  navigation: navigationReducer,
});

const store = createStore(rootReducer);

const App = () => {
  return (
    <Provider store={store}>
      <NavigationContainer>{/* Navigation components */}</NavigationContainer>
    </Provider>
  );
};
4. Optimizing Performance
- Lazy Loading: Optimize performance by lazy loading screens only when necessary, using React Navigation’s lazy-loading capabilities:
<Stack.Screen
name="Details"
component={DetailsScreen}
options={{ lazy: true }}/>
- Memoization: Implement memoization techniques to prevent unnecessary re-renders of navigation components and screens:
import { memo } from 'react';

const MemoizedScreen = memo(ScreenComponent);
You can use React Navigation’s robust features for smooth navigation experiences in your React Native application by following these steps.
2. React Native Navigation Implementation Guide
Using native components from the iOS and Android platforms, React Native Navigation provides a navigation method that is performance-focused. Follow this guide to integrate React Native Navigation into your React Native project:
-
Installation and Setup
Installation: Start by installing React Native Navigation and its dependencies using npm or yarn:
npm install react-native-navigation
or
yarn add react-native-navigation
- Linking Dependencies: After installing the package, link native dependencies using React Native’s linking command:
npx react-native link react-native-navigation
- Initialize Navigation: Initialize React Native Navigation in your app’s entry point, typically index.js:
import { Navigation } from 'react-native-navigation';

Navigation.registerComponent('App', () => App);
Navigation.events().registerAppLaunchedListener(() => {
  Navigation.setRoot({
    root: {
      component: {
        name: 'App',
      },
    },
  });
});
2. Utilizing Native Components
Navigation Components: Define navigation components using native stack, bottom tabs, top tabs, or side menu options provided by React Native Navigation:
Navigation.setRoot({
  root: {
    bottomTabs: {
      children: [
        {
          stack: {
            children: [
              {
                component: {
                  name: 'Home',
                },
              },
            ],
            options: {
              bottomTab: {
                text: 'Home',
              },
            },
          },
        },
        // Other bottom tab screens
      ],
    },
  },
});
- Customization: Customize navigation options such as screen animations, transitions, and styling using native configuration options:
Navigation.setDefaultOptions({
  topBar: {
    title: {
      color: 'white',
    },
    background: {
      color: '#4d089a',
    },
  },
});
3. Handling Complex Navigation Flows
- Nested Navigators: Handle complex navigation flows by nesting navigators within each other to represent hierarchical app structures:
Navigation.setRoot({
  root: {
    stack: {
      children: [
        {
          component: {
            name: 'MainStackNavigator',
          },
        },
        // Other stacked screens
      ],
    },
  },
});
- Modals and Overlays: Implement modal screens and overlays using React Native Navigation’s built-in modal and overlay APIs for displaying temporary UI components:
Navigation.showModal({
  stack: {
    children: [
      {
        component: {
          name: 'ModalScreen',
        },
      },
    ],
  },
});
4. Testing and Debugging
- Device Testing: To guarantee consistent behaviour across various platforms and screen sizes, test navigation flows on actual devices as well as simulators.
- Debugging Tools: Use the debugging tools that React Native Navigation offers, like error reporting and logging, to identify and resolve navigational problems.
By following this guide, you can seamlessly integrate React Native Navigation into your React Native app and leverage its native performance advantages for smooth and efficient navigation experiences.
3. NavigatorIOS Implementation Guide
NavigatorIOS is a navigation tool specifically designed for iOS apps, providing navigation components optimized for iOS user expectations. Here’s a guide to implementing NavigatorIOS in your React Native project:
1. Installation and Setup
- Installation: NavigatorIOS comes pre-installed with React Native for iOS projects. Ensure you have set up your React Native project for iOS development using Xcode.
- Import NavigatorIOS: Import NavigatorIOS component from the react-native package to utilize it in your app:
import { NavigatorIOS } from 'react-native';
2. Configuring Navigation Stack
- Define Initial Route: Specify the initial route for NavigatorIOS by providing a component to render as the initial screen:
<NavigatorIOS
  initialRoute={{
    component: HomeScreen,
    title: 'Home',
  }}
  style={{ flex: 1 }}
/>
- Define Route Stack: Configure additional routes by specifying components to render for each route along with their respective titles and any other navigation options:
<NavigatorIOS
  initialRoute={{
    component: HomeScreen,
    title: 'Home',
  }}
  renderScene={(route, navigator) => {
    switch (route.title) {
      case 'Home':
        return <HomeScreen navigator={navigator} />;
      case 'Details':
        return <DetailsScreen navigator={navigator} />;
      default:
        return null;
    }
  }}
  style={{ flex: 1 }}
/>
3. Handling Navigation Actions
- Navigating Forward: Use the NavigatorIOS’s push method to navigate to a new screen and add it to the navigation stack:
this.props.navigator.push({
  component: DetailsScreen,
  title: 'Details',
});
- Navigating Back: Trigger navigation back to the previous screen using the NavigatorIOS’s pop method:
this.props.navigator.pop();
4. Integrating with iOS Design Guidelines
- Adhere to iOS Design Guidelines: Ensure that navigation components and behaviors provided by NavigatorIOS align with Apple’s Human Interface Guidelines for consistent and intuitive user experience.
- Customize Navigation Bar: Customize the appearance of the navigation bar using NavigatorIOS’s navigationBar prop to set titles, colors, and other styles:
<NavigatorIOS
  initialRoute={{
    component: HomeScreen,
    title: 'Home',
  }}
  navigationBarHidden={false}
  titleTextColor="white"
  tintColor="white"
  barTintColor="#007AFF"
/>
Using the iOS-centric navigation components and behaviours of NavigatorIOS, you can integrate it into your React Native app and give iPhone and iPad users a smooth and user-friendly navigation experience by following this guide.
4. React Router Native Implementation Guide
React Router Native facilitates easier navigation within React Native applications by extending web navigation paradigms to mobile apps. Here’s how to use React Router Native in your project, sequentially:
1. Installation and Setup
- Installation: Begin by installing React Router Native and its dependencies using npm or yarn:
npm install react-router-native
or
yarn add react-router-native
- Import Components: Import necessary components from react-router-native to utilize routing functionality in your app:
import { NativeRouter, Route, Link } from ‘react-router-native’;
2. Configuring Routes
- Define Routes: Specify routes for different screens/components within your app using Route components provided by React Router Native:
<NativeRouter>
  <Route exact path="/" component={HomeScreen} />
  <Route path="/details" component={DetailsScreen} />
</NativeRouter>
- Linking Between Routes: Use Link components to create links between different routes for navigation within your app:
<Link to="/details">
  <Text>Go to Details</Text>
</Link>
3. Handling Navigation Actions
- Programmatic Navigation: Utilize Redirect component or history object to perform programmatic navigation between routes based on user actions or application logic:
import { Redirect } from 'react-router-native';

const HomeScreen = ({ loggedIn }) => {
  if (!loggedIn) {
    return ;
  }
  // Render Home screen content
};
4. Integrating with React Ecosystem
Redux Integration: To handle navigation state and launch navigation actions in your Redux store, integrate React Router Native with Redux:
import { createStore, combineReducers } from 'redux';
import { Provider } from 'react-redux';
import { NativeRouter, Route } from 'react-router-native';
import { ConnectedRouter, routerReducer } from 'react-router-redux';

const rootReducer = combineReducers({
  router: routerReducer,
  // Other reducers
});

const store = createStore(rootReducer);

const App = () => {
  return (
    <Provider store={store}>
      <NativeRouter>
        <Route path="/" component={MainComponent} />
      </NativeRouter>
    </Provider>
  );
};
- Integration with Navigation Libraries: To increase its functionality and tailor the navigation experience to your app’s needs, integrate React Router Native with other navigation libraries or components.
By following this guide, you can effectively implement React Router Native in your React Native app and leverage its familiar web navigation paradigms for seamless navigation experiences across different screens and components.
5. React Native Navigation Experimental Implementation Guide
React Native Navigation Experimental introduces cutting-edge navigation features and capabilities for developers seeking to push the boundaries of navigation in React Native apps. Here’s a guide to implementing React Native Navigation Experimental in your project:
1. Installation and Setup
- Installation: Start by installing React Native Navigation Experimental and its dependencies using npm or yarn:
npm install react-native-navigation-experimental
or
yarn add react-native-navigation-experimental
- Import Components: Add the following components to your app’s react-native-navigation-experimental to enable navigation:
import { NavigationExperimental } from 'react-native-navigation-experimental';
2. Configuring Navigation Components
- Define Navigation Structure: Specify the structure of your navigation using NavigationExperimental’s navigation components, such as NavigationCardStack, NavigationTabs, or NavigationDrawer:
<NavigationExperimental.CardStack
  navigationState={this.state.navigationState}
  renderScene={this.renderScene}
/>
- Render Scenes: Implement the renderScene function to render scenes/components based on the current navigation state:
renderScene(sceneProps) {
  const { route } = sceneProps.scene;
  switch (route.key) {
    case 'home':
      return <HomeScreen />;
    case 'details':
      return <DetailsScreen />;
    default:
      return null;
  }
}
3. Handling Navigation Actions
- Navigating Forward: Use navigation actions such as push, pop, jumpTo, etc., to navigate between scenes/components within your navigation stack:
onPress={() => {
  const action = NavigationExperimental.Actions.push({
    key: 'details',
  });
  this.props.navigation.dispatch(action);
}}
- Navigating Back: Trigger navigation back to the previous scene/component using the pop action:
onPress={() => {
  const action = NavigationExperimental.Actions.pop();
  this.props.navigation.dispatch(action);
}}
4. Integrating with React Ecosystem
- Redux Integration: React Native Navigation Experimental and Redux can be used together to customise the way your application navigates between screens. The Redux store allows you to control this process:
import { createStore, combineReducers } from 'redux';
import { Provider } from 'react-redux';
import { NavigationExperimental } from 'react-native-navigation-experimental';

const rootReducer = combineReducers({
  navigation: NavigationExperimental.StateUtils.Reducer(),
  // Other reducers
});

const store = createStore(rootReducer);

const App = () => {
  return (
    <Provider store={store}>
      <NavigationExperimental.CardStack
        navigationState={store.getState().navigation}
        renderScene={this.renderScene}
      />
    </Provider>
  );
};
- Integration with Other Navigation Libraries: You can make React Native Navigation Experimental do even more by connecting it with other navigation tools or parts. This way, you can customize how your app moves around to fit exactly what you want.
With this guide, you can effortlessly implement React Native Navigation Experimental in your React Native app and use its advanced navigation features and capabilities to create unique and creative navigation experiences.
6. React Native Gesture Handler Implementation Guide
With the help of React Native Gesture Handler, developers of React Native apps can create responsive and fluid navigation interactions for their apps. The following will help you incorporate React Native Gesture Handler into your project:
1. Installation and Setup
- Installation: Start by installing React Native Gesture Handler and its dependencies using npm or yarn:
npm install react-native-gesture-handler
or
yarn add react-native-gesture-handler
- Linking Dependencies: After installing the package, link native dependencies using React Native’s linking command:
npx react-native link react-native-gesture-handler
- Import Components: Add in the required components from react-native-gesture-handler to enable gesture-based navigation within your application:
import { GestureHandler } from 'react-native-gesture-handler';
2. Configuring Gesture-Based Navigation
- Define Gesture Handlers: Implement gesture handlers for different touch movements and actions using GestureHandler’s provided components, such as TapGestureHandler, PanGestureHandler, etc.:
<GestureHandler.TapGestureHandler
  onHandlerStateChange={({ nativeEvent }) => {
    if (nativeEvent.state === GestureHandler.State.ACTIVE) {
      // Handle tap gesture
    }
  }}
>
<View style={styles.container}>
    {/* Content */}
</View>
</GestureHandler.TapGestureHandler>
- Respond to Gesture Events: Define callback functions to respond to gesture events, such as tap, swipe, pinch, etc., and update navigation accordingly:
onSwipeLeft={() => {
  // Handle swipe left gesture
}}
onSwipeRight={() => {
  // Handle swipe right gesture
}}
3. Handling Navigation Actions
- Navigating Forward: Use gesture-based navigation gestures, such as swipe or drag, to navigate forward to the next screen or component:
onSwipeLeft={() => {
  // Navigate forward to the next screen
}}
- Navigating Back: Implement gesture-based navigation gestures, such as swipe or drag, to navigate back to the previous screen or component:
onSwipeRight={() => {
  // Navigate back to the previous screen
}}
4. Integrating with React Ecosystem
Redux Integration: Connect React Native Gesture Handler with Redux to monitor screen transitions in your app and automate them:
import { createStore, combineReducers } from 'redux';
import { Provider } from 'react-redux';
import { GestureHandler } from 'react-native-gesture-handler';

const rootReducer = combineReducers({
  // Reducers
});

const store = createStore(rootReducer);

const App = () => {
  return (
    <Provider store={store}>
      {/* App components */}
    </Provider>
  );
};
- Integration with Other Navigation Libraries: To increase its functionality and adapt the navigation experience to your app’s needs, integrate React Native Gesture Handler with other navigation libraries or components.
Finding the Right Partner for React Native Navigation Implementation
When seeking a development partner for React Native navigation implementation, consider the following aspects:
Expertise and Experience
Look for a team with a solid background in React Native development and specific experience in implementing navigation solutions. Prioritize partners who have successfully delivered similar projects in the past.
Navigation-Specific Skills
Ensure that the partner possesses a deep understanding of various navigation libraries and can customize navigation components to suit your app’s unique requirements.
Collaboration and Communication
Select a partner who appreciates open communication and teamwork. Maintaining alignment between your project and your vision is made possible through efficient interaction.
Reviews and References
Look for references and feedback from customers to determine the partner’s standing and degree of client satisfaction. Positive feedback from prior customers is a good sign of dependability and high-quality service.
Project Management and Support
Assess the post-development support services and project management methodology used by the partner. A structured project management process and ongoing support ensure a smooth development experience and long-term success.
Budget and Pricing
Take into account the partner’s pricing models and make sure your spending limits are met. Seek partners who maintain quality standards while offering affordable rates.
Cultural Fit and Compatibility
Assess the partner’s cultural fit with your organization and compatibility with your working style. A collaborative and harmonious relationship fosters a positive development experience.
How Imenso Software Can Help
Imenso Software ticks all the boxes when it comes to finding the right partner for React Native navigation implementation. With our knowledge, experience, and dedication to quality, we provide:
Lots of Experience and Skills
At Imenso Software, we have considerable expertise with React Native and are well-versed in navigation. Whether you require simple navigation or something more customized, we have you covered.
Good at Working Together
Our developers know that keeping in touch and collaborating closely with you is important. We know the worth of your project and will make every effort to guarantee that it achieves your goals.
Happy Clients
Our previous customers have been extremely satisfied with our work. Go through our testimonials section, or contact us to get references and you will get every assurance you need. The positive things they’ve said about us make us proud.
Smooth Sailing
We’re organized and reliable. We’ll manage your project well and be there to support you even after your app is finished.
Fits Your Budget
At Imenso Software, we understand that money matters. Our rates are reasonable, and we’ll collaborate with you to identify a solution that meets your needs.
Gets Along with You
We’ll make sure we understand your company and work well with your team. It’s important to us that we get along and work together smoothly.
Imenso Software is your ideal partner for React Native navigation implementation. Let us help you navigate the complexities of mobile app development and deliver seamless navigation experiences that exceed your expectations.
Wrapping it Up
As we conclude our expedition through React Native Navigation, it’s clear that navigation is the essence, not just a technicality, of your app’s user experience. The routes we’ve explored, from React Navigation’s adaptability to React Native Navigation’s native power, all lead to the same destination: crafting seamless, captivating navigation flows that users will treasure.
Yet, it’s more than library choices – it’s embracing best practices that transform navigation into a symphony. Simple hierarchies, optimized performance, user-centric design, and accessibility are the currents steering your app’s journey.
With this newfound knowledge and best practices in hand, you’re poised for your navigation adventure. Be it a startup launch or digital transformation, you hold the key to exceptional navigation.
Ready to set sail? Trust Imenso Software, your partner in crafting remarkable mobile experiences. With React Native expertise, they’ll navigate you through complexities, ensuring your app shines. Navigate to success with Imenso Software at your side.
We’re honored to mention that our efforts have been recognized by renowned B2B review and research platforms such as GoodFirms, Clutch, MirrorView, and many more.
Want more information about our services?


Similar Posts

Offshore vs. Nearshore vs. Onshore Development: What’s Best for Scaling Startups?
Startup entrepreneurs find building an effective development team at affordable prices challenging. The executives must choose between working with local developers or overseas workers. Also, it’s tough to choose between domestic developers and overseas outsourcing. But, this will help you optimize price, quality maintenance, and team bonding. WhatsApp represents a successful company whose operations significantly […]...

Build vs. Buy Software – What Should You Choose?
Are you stuck in solving a riddle to choose between building or buying software? Whatever the requirements are, you must go through the entire software analysis process to make the right decision. Buy when you can, build when you must! ~Martin Fowler Since the line between building and buying has blurred, the stakes are still […]...

Top .NET Libraries for Efficient RESTful API Development
Have you ever clicked a website link, only to be disappointed by a blank screen for the next few minutes? Infuriating, isn’t it? In most cases, the problem stems from inefficient APIs integrated into the website. Most businesses deal with this problem regularly which is the reason why having a trusted dot net development company […]...